The BioSense 3 software controls and records experiments using the Quartz Crystal Microbalance with Impedance (QCM-I) instrument. Other instrumentation can also be controlled with the software to provide integrated experiments, e.g. Gamry potentiostats for electrochemical QCM-I measurements. Other equipment can also be synchronized with the QCM-I experiment using the digital In/Out port. This technical note details how to use the auxiliary port for experiment/data synchronization.
Overview
The Digital In/Out port for external data synchronization can be used in two different ways:
- Wait for Trigger: The BioSense software initializes the QCM-I measurement and then waits for the incoming trigger signal to become high (from 0V to between 3.3V and 5V). It then starts recording data.
- Generate Trigger: BioSense initializes the QCM-I measurement and then generates a high signal on the output trigger line (3.3V) and starts recording data. When the measurement is stopped, the signal is set low again (0V). If both options are selected, the wait function takes priority.
The software waits for an input signal and generates an output “handshake” when it receives the input signal. In the wait for trigger mode, when the external trigger drops back down again the measurement continues and does not stop.
QCM-I and Software Version
External data synchronization is available on QCM-I instruments fitted with a digital In/Out port and running BioSense software version 3.21.0 or later.
Experimental Hardware Setup
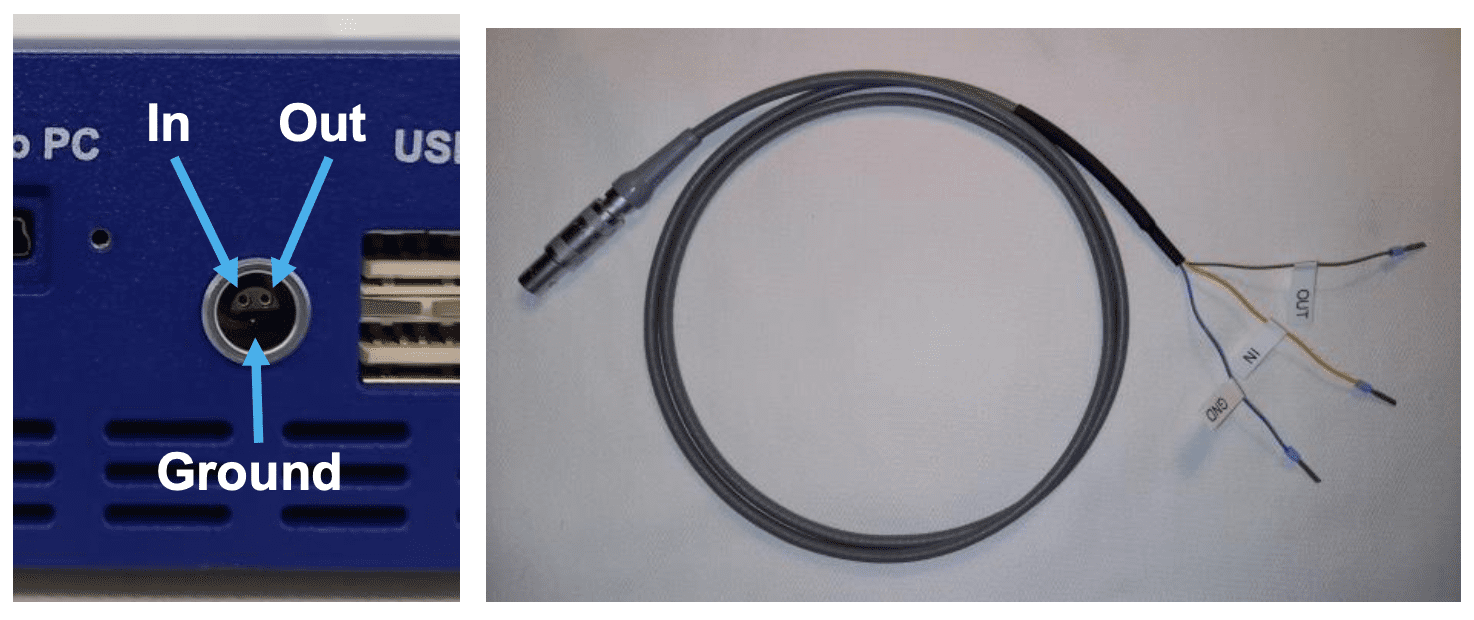
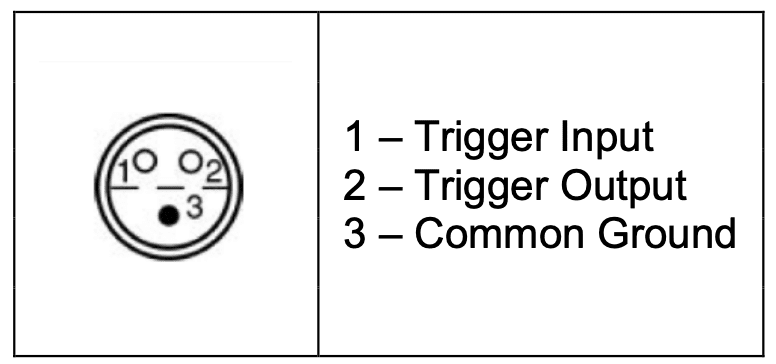
Figure 1 shows the location of the Digital In/Out port on the rear of the QCM-I Mini instrument. The pin assignments and the electrical characteristics of the Digital In/Out port are shown in figure 2. The connections at the open end of the auxiliary cable should be wired according to the external instrument specification.


Software Control
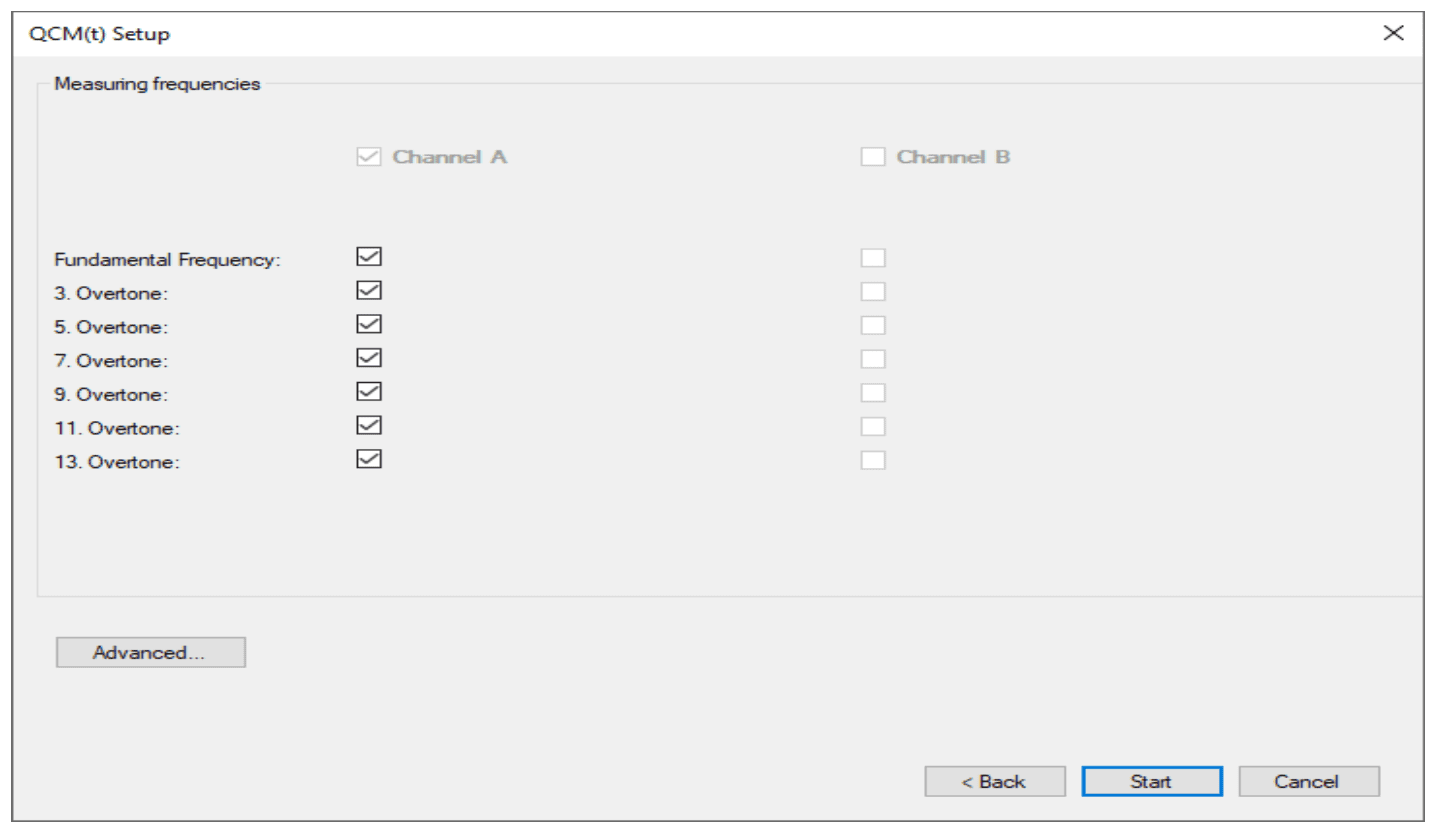
The data synchronization settings are accessed from the setup menu shown in figure 3 below by clicking the “Advanced” button.

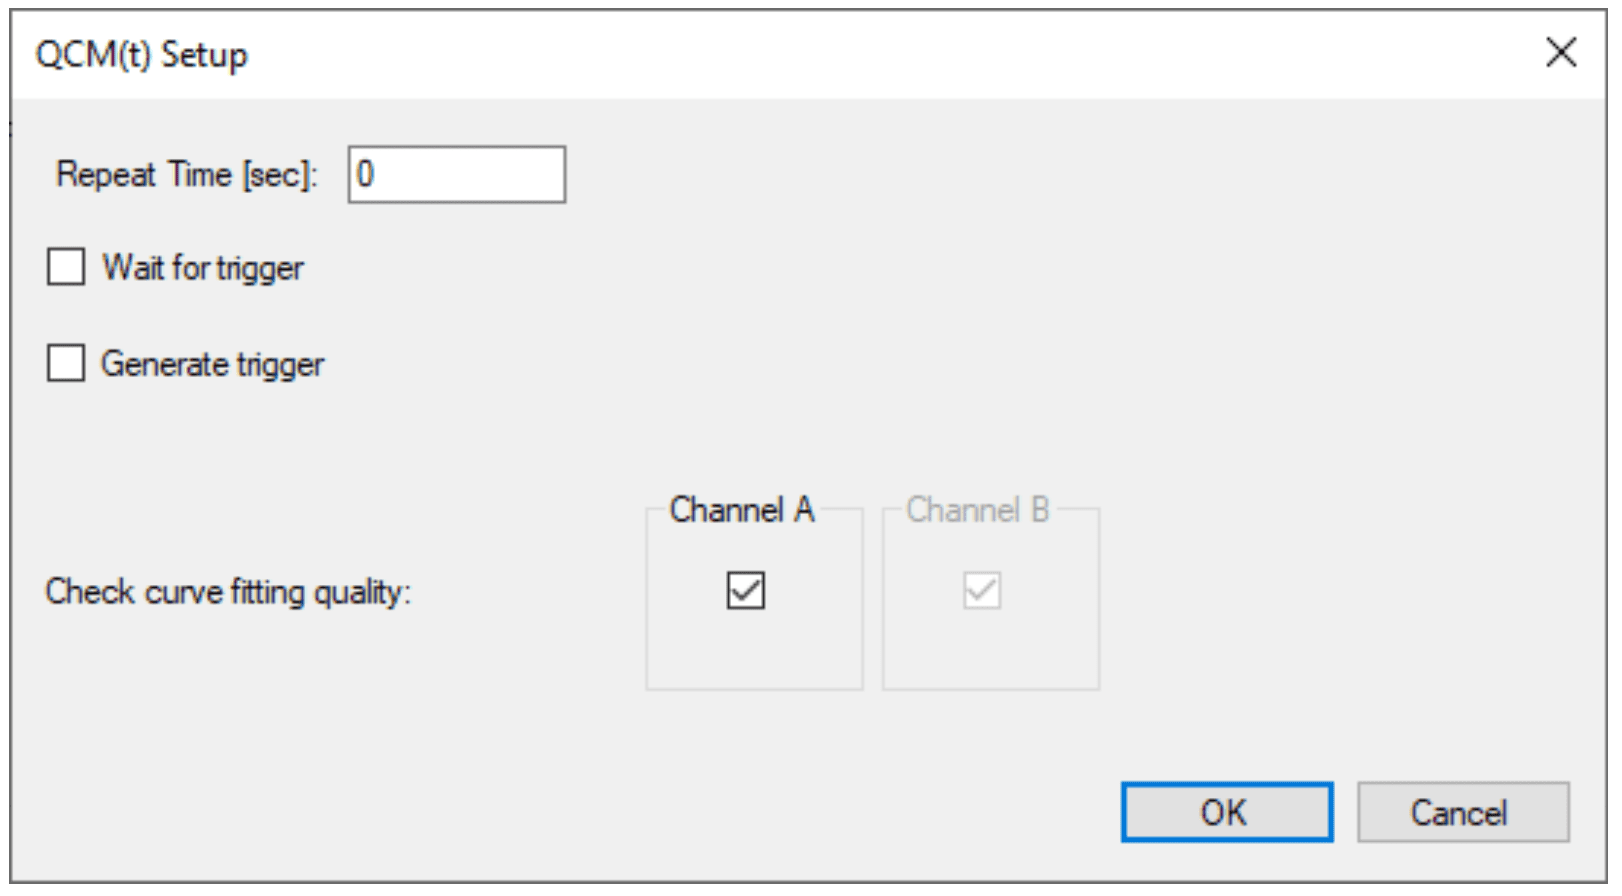
The Advanced setup options are shown in Figure 4.
In the Advanced options the “Repeat Time” and the “Check curve fitting quality” options as well as the Trigger function can be selected.

Further details about the QCM-I hardware and BioSense 3 software can be found in the “ eQCM-I User Manual ” and in the “ QCM-I Software Manual ” respectively.